Have a question? Send us a quick message!

Architectural Designer
& Project Consultant
in Mississauga, ON
Guaranteed Permit Approval or Your Money Back
We offer professional, affordable, and fast architectural design services and specialize in creating stunning architectural drawings and house plans tailored to your needs.
From obtaining residential building permits for Finished Basements, Home Additions and Detached Garages to designing Additional Dwelling Units (ADUs), Legal Basement Apartments, Duplex, Triplex, or Fourplex Conversions, and Backyard Homes also known as Garden Suites.
We offer professional, affordable, and fast architectural design services.
From obtaining residential building permits for Finished Basements, Home Additions and Detached Garages to designing Additional Dwelling Units (ADUs), Legal Basement Apartments, Duplex, Triplex, or Fourplex Conversions, and Backyard Homes.
Regions We Serve


Featured In
How We Strive To Be The Best Architectural Designer in Southwestern Ontario

Transparent Pricing
Our detailed proposal provides clear, upfront pricing with no hidden fees or surprises.

Clear Communication
Receive regular updates and stay informed throughout the entire design and permit process.

Quick Turnaround
Our efficient team completes projects promptly, so you can get to the fun stuff sooner.

Expert Advice
Enjoy professional advice to find the perfect design that meets your style and needs.
Our Services
When we understand your scope of work, budget, timelines, and have examined every aspects of your property we can then tailor a game plan specific to your needs, so you can have peace of mind when putting your trust in us to deliver.

Design Services
Quality residential designs by our in-house BCIN Designer. We'll optimize layouts and manage the building permit process for you.

Project Consulting
Avoid costly mistakes by getting our expert advice in property conversions and building code requirements.
Why Are You Planning Your Project?
Before diving into the details of your permit drawing needs, it's important to clarify the goals and priorities for your project.
Consider the following reasons:
Enhance functionality and efficiency.
Accommodate growing family needs, such as children entering adulthood or parents wanting to age in place.
Create open concept floor plans
Adding architectural features that reflect your personal style and taste.
Increase property value.
Create a secondary source of income.
Will I Need a Permit for My Project?
Navigating the permit process is an essential step in ensuring that your bathroom remodel meets building codes and regulations.
Here's what you need to know:
A permit is required when demolishing an existing structure and when constructing a new one.
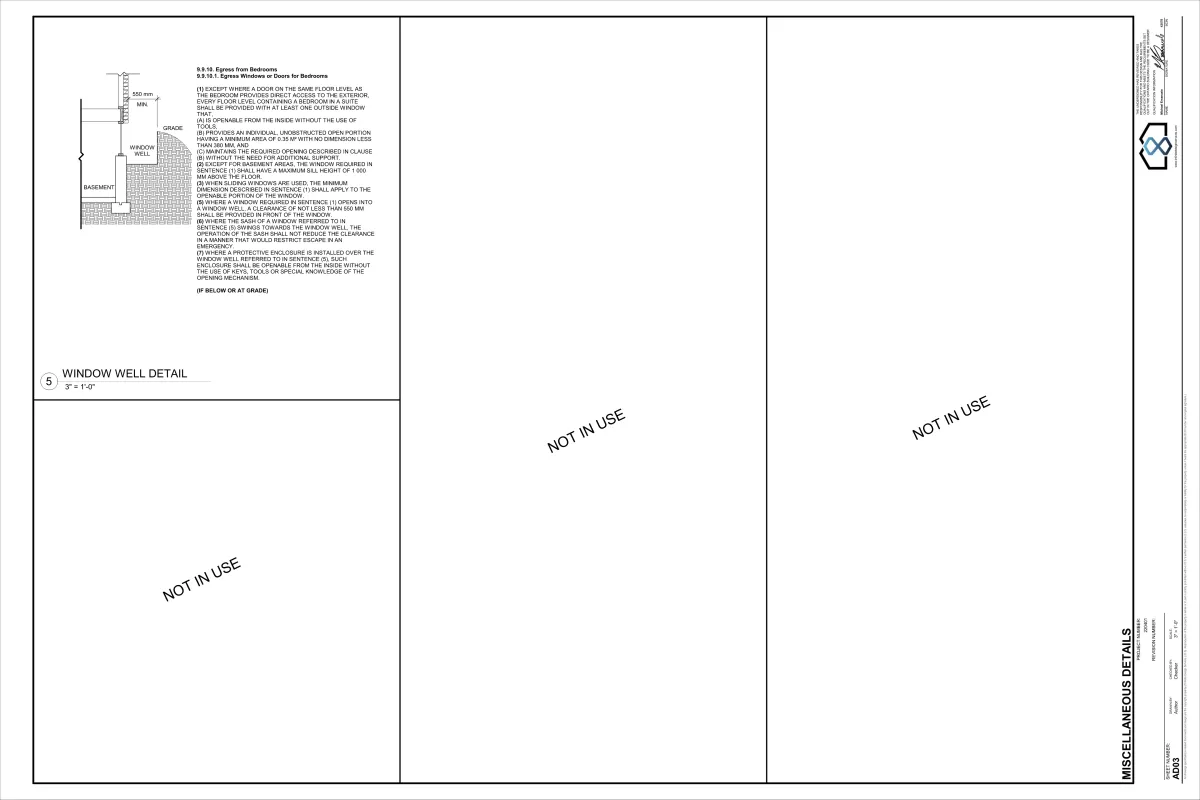
A permit is required when structural changes are required. For example, replacing a load-bearing wall with a structural beam, or adding new openings like windows.
A permit may also be required when making significant changes to plumbing and electrical services.
A design team that can assist with obtaining permits and ensuring compliance.
How much do your design services cost?
When we understand your vision and have examined every aspect of your property we provide a fee proposal specific to your needs.
Here are some factors to consider when estimating costs:
Size and scope of the project. (e.g., adding a bathroom, building a backyard home)
Are other consultants such as property surveyors, arborists, structural engineers, HVAC engineers, Plumbing engineers, and Electrical engineers needing to be involved.
Will a Minor Variance application be needed because a specific aspect of the planning project does not fall within the constraints of the City's Zoning By-Law.
What's Involved in The Building Permit Process?
Tri-City Builders has an in-house BCIN Designer that can assist you with the design and development of your building permit drawings. Our friendly and knowledgeable team will ensure your builder permit drawings comply with the latest Municipal Zoning By-Laws, Ontario Building Code, and Ontario Fire Code.
Here are the key steps involved in the building permit process:
1. Initial Consultation
a) We meet with you to discuss the project and gather information about your needs and requirements.
b) Provide our fee proposal for the design activities.
c) Client to review, sign back, and send Retainer Fee.
2. Site Measurements
a) Conduct a detailed site measurement of your property to create accurate as-built floor plans.
NOTE: A recent site survey may be required for the permit submission. If a copy is not available a Licensed Land Surveyor may be required. (Additional charges apply)
3. Design Development
a) Create a conceptual design based on the information gathered during the initial consultation and from our site measurements.
4. Design Review
a) Review the design with you and make any necessary revisions.
5. Third-Party Engineering
a) Consult with structural, plumbing, HVAC, and electrical engineers as needed to ensure that the design meets all necessary codes and regulations.
NOTE: Consultants fees will be included in our design proposal.
6. Preparation of Architectural Drawings
a) Create detailed architectural drawings, including floor plans, elevations, sections, and details, incorporating feedback from the third-party engineers.
b) Compile building permit drawings, applications and other forms required for the submission.
7. City Review and Approval
a) Submit the architectural drawings to the Municipality’s Building Department. The review process is typically 10 to 20 business days. (Client responsible for paying all permit and development related fees.)
b) If required, submit additional permit applications to Authorities Having Jurisdiction such as the Conservation Authority, Heritage Committee, and Ministry of Transportation, if required.
NOTE: If a Minor Variance is required the application and Committee of Adjustments review process takes approximately 90 days.
8. Permit Approval
a) Obtain all necessary approvals from the Municipality and post a copy of the Permit Card in a street facing window. In addition, have a full printed set of the approved permit drawings available on site.
9. Construction and Inspections
a) Begin construction in accordance with the approved architectural drawings and building permit.
b) Your contractor will need to schedule several Building Inspections during the construction process. The inspections will differ based on your project scope. (e.g., pre-construction, foundation, framing/structural, plumbing rough-in, HVAC rough-in, insulation and vapour barrier, plumbing final, HVAC final, occupancy, final, etc.)
10. Occupancy
a) Once the project is complete, obtain final approval from the Building Inspector or Chief Building Official and any other necessary authorities (e.g., Fire Marshall).
Please note that this is still a sample method of procedure and it may vary depending on the specifics of your project. It’s always good to consult with your local Municipality to ensure compliance with all Zoning By-Laws laws and regulations when deciding to build an Additional Dwelling Unit.
A Message from the Founder
Our Commitment to You
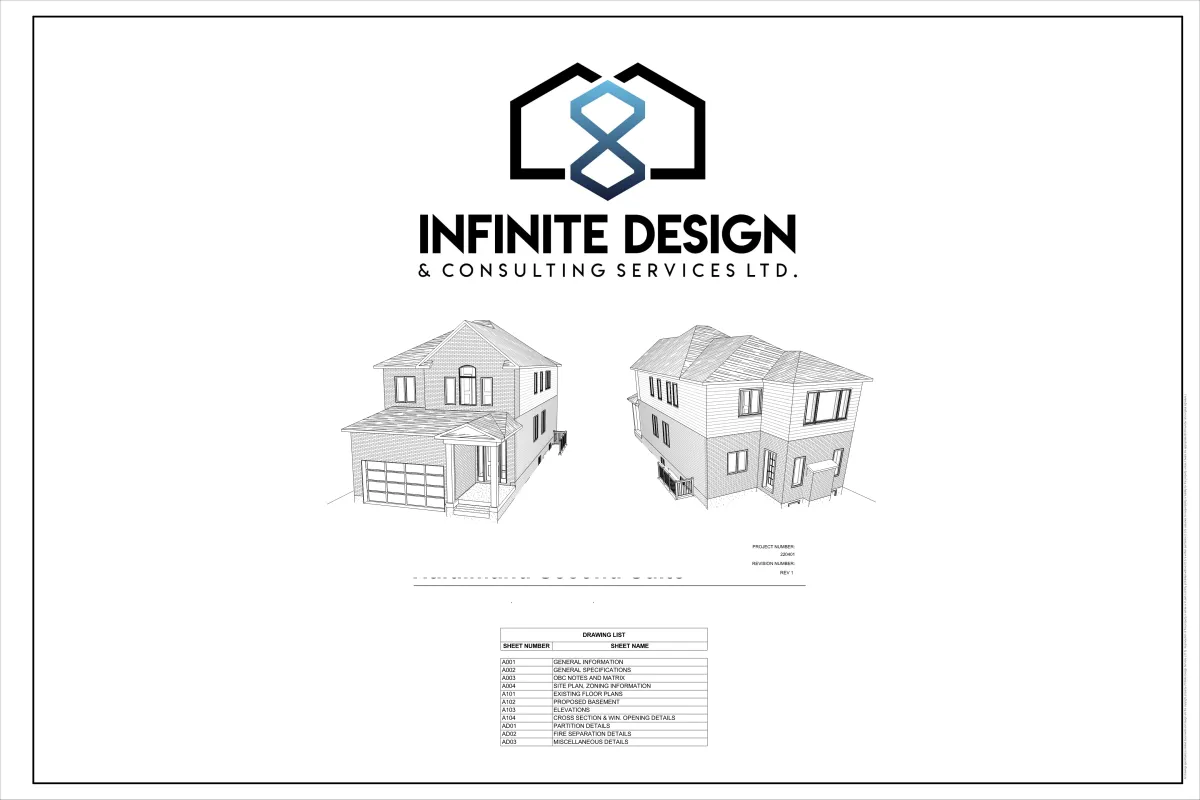
I founded Infinite Design & Consulting Services Ltd. with a clear vision to transform spaces and enrich lives.
With a deep-rooted passion for architecture and a steadfast commitment to our community, we've built a team of dedicated professionals who share this vision.
My journey in the construction industry spans over a decade, during which I've had the privilege of working on a diverse range of residential and commercial projects, totaling over $100 million in value. This extensive experience has equipped me with a comprehensive understanding of the construction process, from conceptualization to completion.
I believe that every project is an opportunity to create something extraordinary. We are committed to delivering exceptional results that exceed our clients' expectations.
At Infinite Design & Consulting Services Ltd., we are more than just a design firm. Every project is treated an an opportunity to create something extraordinary. We are your partners in creating spaces that inspire and function seamlessly.
Our goal is to exceed your expectations and deliver exceptional results that stand the test of time. And success is built on trust, open communication, and a shared dedication to turning your vision into reality.I invite you to explore our portfolio and learn more about how our team can help you achieve your goals.
Thank you for considering Infinite Design & Consulting Services Ltd. for your next project. We look forward to the opportunity to work with you.
Sincerely,
Michael Emanuele


What Our Customers Are Saying
Educational Resources
How Do I Remove a Load-Bearing Wall?
This post will continue right where How to Know If It’s a Load-Bearing Wall? left off.
After reading that blog post you may have been asking yourself “What is my next step?”
If you determine that you are dealing with a load-bearing wall. You’ll certainly want to know before reaching for your sledge hammer… That’s good, because I’ll be covering the following today:
The steps involved in obtaining a Building Permit.
The different solutions available to help you stay on budget.
I’ll begin with this disclaimer…
If you are planning a large renovation, particularly one that involves altering the existing structure (or adding new structure), I recommend you start by assembling a team of qualified professionals who are well-versed in larger renovations.

A Designer who has a BCIN (Building Code Identification Number). Communicate your vision to them and they’ll translate it into a conceptual design. Putting digital pen to paper, so to speak.
The BCIN I mentioned qualifies them to draft, stamp and submit permit drawings to the Municipality’s Building Department on your behalf.A Licensed Structural Engineer to assess the situation. They’ll review the current structure and formulate a new structural design that suits the conceptual design; budget notwithstanding.
An experienced General Contractor, or subcontractors if you’re self-managing, to execute the renovation work. It all starts with knowing What Does a General Contractor Do? and I have an entire five-part series dedicated to help you find, qualify and hire a General Contractor. Check it out!
Okay, so now you know the core members of your team.
Here is a play-by-play breakdown of the steps leading up until the contractor’s work:
Contact your Municipality’s Building Department and request to speak with a Plans Examiner. Review the proposed work with them. They are very receptive and will advise you when a Building Permit is required. A Building Permit is a must when there are structural alterations or additions involved.
The Structural Engineer must visually confirm the existing structural conditions. Factoring in the various structural loads and forces they’ll create a new structural design.
The Structural Engineer will provide their structural details to a qualified Designer who will then add them to the Permit drawings.
The details will include size and location of new posts and beams as well as connection details. Gusset plates, joists hangers, size and length or screws or nails, etc.The Structural Engineer will review and seal/stamp the structural design before the Permit drawings are submitted to the Building Department.
The seal/stamp means shows they are licensed and responsible for the structural design.You are ready to submit your Building Permit application to the Municipality’s Building Department.
There are advantages to having a Designer with their BCIN submit the Permit Application on your behalf, including direct communication with the Plans Examiner.The Building Department will complete their review and if they don’t come back with comments, they’ll issue the Building Permit.
The work can then commence. The Building Permit must be posted where it’s clearly visible on the work site.
Follow the above steps exactly as I’ve outlined and you’ll be far better off than if you try to cut corners.
You know what they say. If you don’t do it right, then don’t do it at all.
Next…
What are some possible options to replace the load-bearing wall?
Well, with advancements in building materials and systems there are solutions to every problem. It really come down to your vision and your budget.

Here are some different options to achieve an open concept floor plan from less intrusive to more intrusive.
The more intrusive the solution, the more costly material and labour will be.
Create an opening in the load-bearing wall.
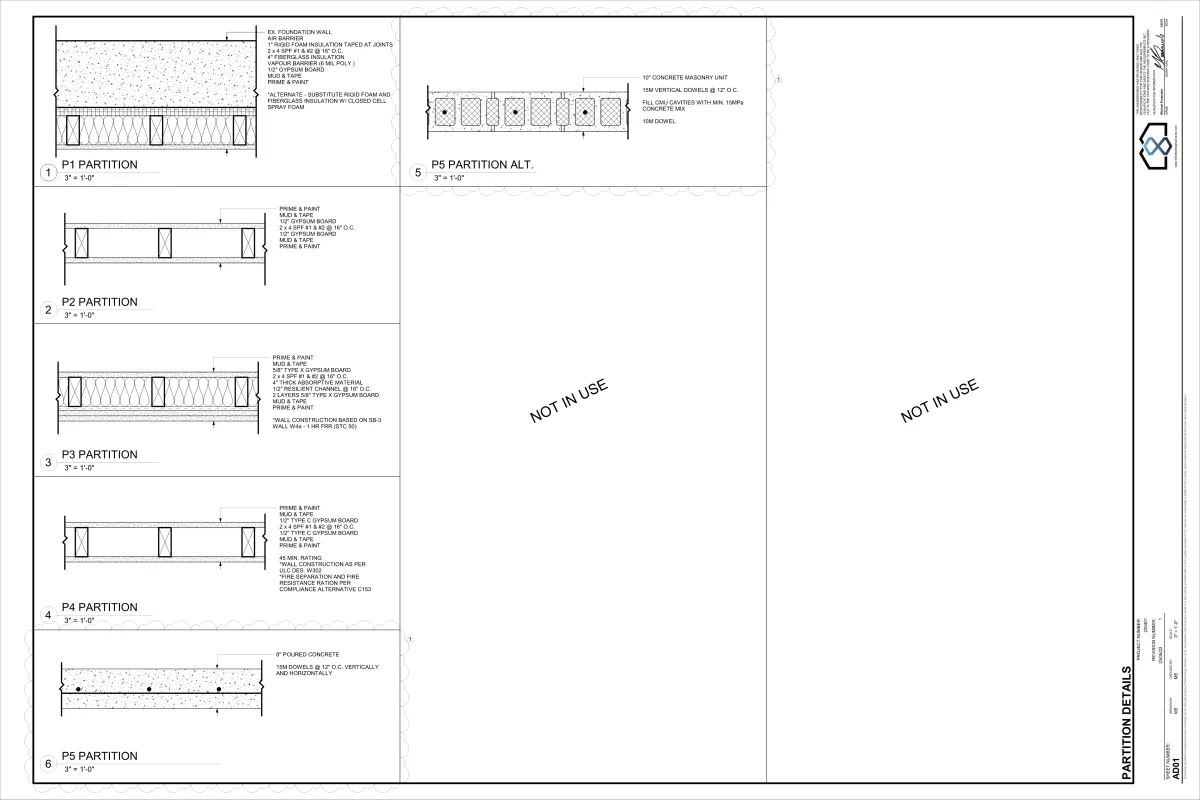
A header / lintel consisting of multiple layers of dimensional lumber (2×6, 2×8, 2×10, etc.) will span across the opening. The greater the width of the opening, the larger the lumber required. Each end of the header will seat on a post, or built-up framing (2×4, 2×6, etc.).
The structure below needs to be sufficient as well.Remove a portion of the wall.
Add a surface mounted beam. The structure above (ie: floor joists) will sit on top of a surface mounted beam. Much like it already sits on top of the load-bearing wall.
A drywall bulkhead will have to be built around the surface mounted beam.
Depending on the span, the beam will be multiple layers of dimensional lumber (mentioned above), a single layer or multiple layers of Laminated Veneer Lumber (LVL), or a steel I-beam.
Similarly to #1, the greater the width the deeper the beam required. On either side of the header it will seat on a post, or built-up framing (2×4, 2×6, etc.).
Again, the structure below needs to be sufficient.Remove the entire wall.
There are two options:Add a surface mounted beam, similar to the process above.
Depending on the span, the beam will be multiple layers of Laminated Veneer Lumber (LVL), or a steel I-beam. The greater the span, the larger the beam, and the larger the beam, the greater the size of posts or built-up framing required.Add a flush beam.
Rather than the structure above (joists) sitting on the beam, the majority or the entire beam will be flush with the underside of the joists. The joists will be cut to put the beam in place and joist hangers will be attached to the beam for the joists that have been cut shorts to connect to.
This is the most labour and cost intensive amount of work.

Visualize the following.
Where I mention multiple layers and greater depths of beams. Imagine you have a popsicle stick that’s laid flat. If you try to bend it, it will break rather easily. If that same popsicle stick is laid on it’s side, it’s becomes a bit more difficult.
If you get a larger popsicle stick, and try bending it on its side again it becomes even more difficult. If you add two more layers of the larger popsicle sticks (similar to the image above) and try to bend it. It’s nearly impossible without an extreme amount of force.
Take that same concept and apply it to a beam.

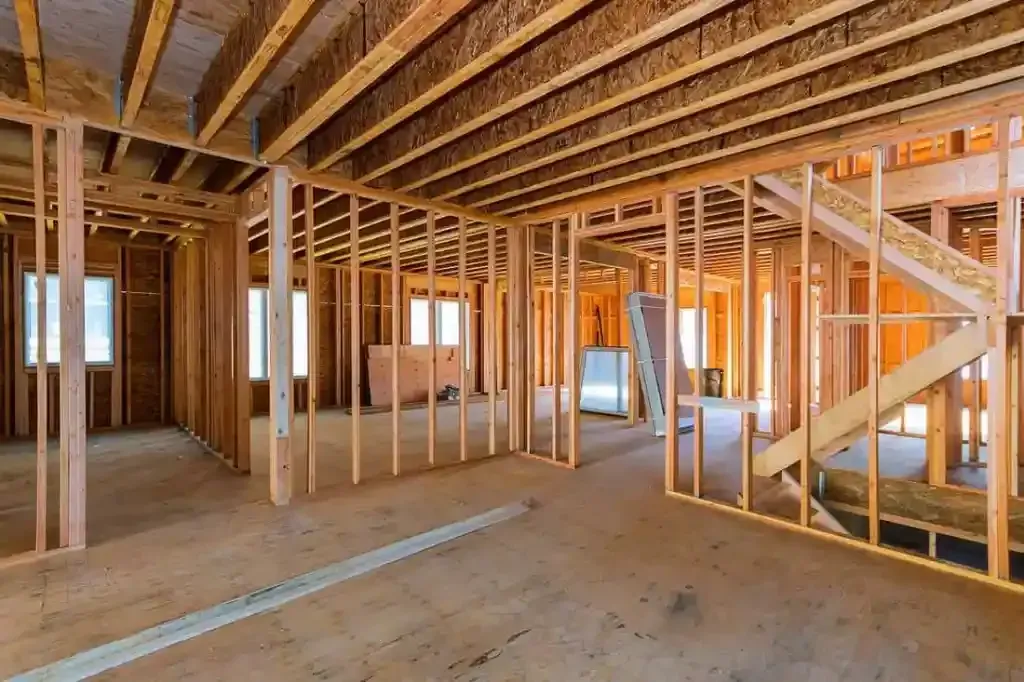
How do you support the floor/ceiling above if you’re removing the load-bearing wall that’s supporting it?
There are two different methods:
Build one temporary wall on either side of the load-bearing wall.
The temporary walls will need to tie into the structure above a below. Both walls together will pick up the slack once the load bearing wall is removed.Build temporary supports using jack posts.
Similar process to the above, but consisting of dimensional lumber top plate and bottom plate used with jack posts to support the transfer of load.
While the whole process I described may sound straightforward do not go into a large renovation haphazardly. There needs to be solid plan in place before you start the work.
That’s why you hire an experienced team to guide you through the process.
Does the thought of spending thousands on something you’ll never see when the renovation is finished send cold shivers up your spine?
Rest assured that it will be money well spent to ensure the safety of yourself, your family, or your tenants (if it’s an investment property).
To recap, today I’ve broken down…
…The importance of engaging an experienced team of professionals.
…The workflow for planning a large renovation including the Building Permit process.
…What options are available to replace that load-bearing wall with and how it’s properly done.
I’ll close out by saying this… Taking the time to properly plan is worth the small investment upfront, in order to avoid future mistakes.
Ensure you do your due diligence and it will pay dividends.
¡Hasta luego!


Rehabbing Your Way to Wealth

Rehabber Secrets
How to Choose a Trustworthy
General Contractor With Integrity
At Infinite Design & Consulting Services Ltd., we understand the importance of finding a trustworthy partner for your home improvement and remodeling projects. The decision to hire a contractor goes beyond skill and price—it's about finding someone you can rely on, someone who values integrity and professionalism.
Here are key insights that we encourage our customers to consider when selecting the right contractor for their needs:
1. Reputation and Experience
First impressions matter. When choosing a contractor, look for a solid reputation backed by years of experience. Ask for referrals from family, friends, and other in your network who have had positive experiences with contractors. When Googling "General Contractors" look at online reviews and testimonials for valuable insights into a contractor's track record. An established General Contractor with a strong reputation is more likely to deliver quality work, on time, and within budget.
2. Licensing and Insurance
Verify that each contractor holds General Liability and WSIB (Workplace Safety Insurance Board) coverage. This protects both you as the homeowner and the General Contractor in case of accidents or damages to yourself, family, guests, workers, and property during the project. Before hiring a General Contractor ensure to request a copy of their General Liability Insurance coverage, and WSIB Clearance Certificate. (Using this link: https://clearances.wsib.ca/Clearances/eclearance/start?lang=en you can search WSIB's directory to ensure a General Contractors WSIB coverage is active.)
3. Transparent Communication
Communication is key to any project; big or small. A trustworthy contractor will listen to your ideas, address your concerns, and provide clear explanations throughout the process. You want a General Contractor who is accessible and responsive to your calls or emails. Look for a contractor who communicates openly about project timelines, costs, and any potential challenges. They're not afraid to tell you what you need to know, even if it's not what you want to hear.
4. Detailed Contracts and Estimates
Never settle for verbal agreements. A reputable General Contractor will dot their "i's" and cross their "t's." Never under any circumstances should a contractor start a project without first having a detailed written contract outlining all aspects of the project, including scope of work, materials to be used, payment schedule, and timelines. Review the contract carefully and ask questions about anything that is unclear. Similarly, ensure that the estimate is thorough and transparent, with no hidden costs.
5. Quality of Workmanship
Ask for past customer references, ideally within the last 3-6 months, to gauge the quality of a General Contractors recent work. A true professional will take have meticulous attention to detail. Visit completed job sites if possible or request photos of completed work that is similar to what you envision for your own project.
6. Professionalism and Integrity
Choose a contractor who conducts themselves with professionalism and integrity. This includes showing up on time, respecting your property, and treating subcontractors and workers fairly. A contractor who values integrity will prioritize your satisfaction and strive to deliver results that exceed your expectations.
7. Flexibility and Problem-Solving Skills
Home improvement projects rarely go exactly according to plan. Unexpected challenges can and will happen. Look for a General Contractor who demonstrates flexibility and problem-solving skills when faced with issues. An experienced General Contractor will offer creative solutions and adapt to changing circumstances when these challenges inevitably come up.
8. Warranty and Follow-Up
Your General Contractor must stand behind their work. Ask about warranties offered on materials and workmanship. The industry standard is a 1 year warranty on materials and workmanship. Additionally, confirm that the contractor provides a deficiency walkthrough and post-project follow-up to address any concerns that may come up after the project is finished.
Final Thoughts
Selecting a trustworthy general contractor with integrity is essential for the success of your home improvement project. By prioritizing reputation, communication, transparency, and professionalism, you can make better decisions and build lasting relationships with contractors they can trust.
Are You Ready To Work With Us?
Contact Infinite Design & Consulting Services Ltd. to schedule a 15-minute consultation or enter your information below.


Phone
(226) 499-4931
Address
290 King Street E, Kitchener, ON N2G 2L2
Business Hours
Monday: 9:00 AM–5:00 PM
Tuesday: 9:00 AM–5:00 PM
Wednesday: 9:00 AM–5:00 PM
Thursday: 9:00 AM–5:00 PM
Friday: 9:00 AM–5:00 PM
